Wardrobe Drawer Organisation: Fit More, See More, Stress Less
Wardrobe Drawer Organisation: Fit More, See More, Stress Less
Wardrobe drawers bursting at the seams?
If your drawers are a jumble of T-shirts, activewear and random socks, you’re not alone. Clothes get shoved in “for now”, you can never find what you want, and you end up wearing the same few outfits on repeat.
With a few simple wardrobe organisers and a fold-file approach, you can:
- Fit more into every drawer
- See everything at a glance
- Make mornings faster
- Keep seasonal pieces easy to reach
Here’s how to reset your drawers in an afternoon and keep them that way.
Shop Drawer Dividers & Organisers1/7Step 1 – Empty, Edit and Sort by Category
Start with one drawer at a time so it feels manageable:
- Empty everything onto the bed.
- Sort into piles: keep, donate, repair, bin.
- Group “keep” items by type: tees, singlets, shorts, leggings, pyjamas, socks, undies.
Be ruthless with pieces that are worn out, uncomfortable or no longer your style. Passing them on or donating them creates space for the clothes you actually wear.
Once your piles are sorted, you’ll have a clear picture of how much space each category really needs.
2/7Step 2 – Choose the Right Home for Each Category
Not everything needs to live in a drawer. Give prime space to the items you reach for every day.
- Reserve drawer space for underwear, socks, basic tees, sleepwear and activewear.
- Move bulky or rarely used items (off-season knitwear, formal pieces) to shelves, baskets or vacuum bags higher up.
Use wardrobe baskets or tubs on shelves for things like jumpers or jeans, so drawers can stay focused on the everyday categories that benefit most from dividers.
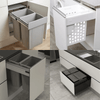
3/7Step 3 – Use Drawer Dividers to Create Clear Sections
Drawer dividers stop clothes sliding into one big messy pile and give every category its own “lane”.
Great uses for dividers and compartment organisers:
- Grid or slot organisers for socks and underwear
- Adjustable dividers for folded tees and shorts
- Shallow organisers for belts, ties and small accessories
Measure your drawers before buying so organisers fit snugly and don’t shift every time you open and close the drawer.
Look for adjustable options so you can tweak the layout as your wardrobe changes.
4/7Step 4 – Switch to a Fold-File Method
Instead of stacking clothes in tall piles, fold them into neat rectangles and store them upright like files in a cabinet.
Benefits of the fold-file method:
- You can see every item at once, even at the back.
- Clothes are less likely to wrinkle in deep piles.
- It’s easier to put clean washing away in the right section.
Use the fold-file method for:
- T-shirts and singlets
- Leggings and gym shorts
- Light pyjamas
Once you’ve done one drawer, the difference is huge – and it becomes much easier to maintain.
5/7Step 5 – Add Mini Baskets for “Loose” Items
Some things never stack neatly – think scarves, swimwear or specialty socks. Instead of letting them float around, give them a contained home.
Use small baskets or fabric bins in drawers (or on shelves) to contain:
- Swimwear sets
- Scarves and beanies
- Sports socks or specialty gear
- Period underwear or specific workwear items
Label the front edge or inside lip of each basket so everyone knows what lives where.
6/7Step 6 – Create a “Night Before” or Outfit-Planning Zone
Make mornings calmer by planning ahead with a dedicated outfit zone.
- Dedicate one shallow drawer or basket to “Tomorrow’s Outfit”.
- Pre-load it the night before with clothes, underwear and socks.
- For kids, keep this drawer at their height so they can get ready independently.
This simple habit works especially well during school terms or busy work weeks.
7/7Step 7 – Keep a Simple Laundry-to-Drawer Routine
A smart system only works if it’s easy to maintain. Build your organisation into laundry day so drawers never drift back into chaos.
- Sort clean clothes by category at the folding stage.
- Fold using your chosen method (stack or file).
- Put items straight into their labelled drawer sections.
If a drawer starts to feel crowded, remove 3–5 items before adding new ones – this keeps clutter from creeping back in.
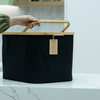
Wardrobe Drawer Essentials – Shop the Look
To set up organised drawers, focus on adjustable dividers, clear compartment organisers, shallow baskets and simple labels so every section is easy to see and maintain.


Wardrobe Drawer Organisation – FAQs
How many drawer organisers do I really need?
Does the fold-file method work for kids?
What if my drawers are very shallow?
How often should I declutter my drawers?
Quick Wardrobe Drawer Checklist
Tick off your wardrobe drawer reset. Your checks stay while this page is open.
Ready to ditch the messy-drawer shuffle? Shop drawer dividers now